프론트엔드 입문 가이드/HTML 기초
[HTML 기초] 7. HTML 태그 총정리 페이지 만들기
반응형
지금까지 살펴본 태그들을 이용해 "HTML 태그 총정리" 웹 사이트 하나 만들어보겠습니다.
1. 파일 생성
우선 파일을 만들어두고 시작하겠습니다. vscode 좌측 창에서 아래 사진의 빨간 부분을 눌러 5개의 파일을 생성해주세요.
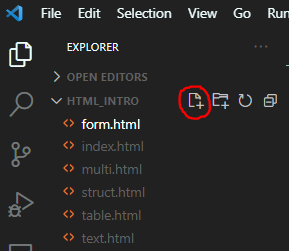
index.html: 홈 페이지text.html: 텍스트 태그 소개 페이지multi.html: 멀티미디어 태그 소개 페이지table.html: 표 태그 소개 페이지form.html: 폼 태그 소개 페이지
2. 홈 페이지 구현
index.html 파일에 들어가 !+tab을 눌러 html 구조를 불러오세요. 그리고 body 부분을 아래와 같이 작성합니다.
<li>를 이용해 메뉴들을 리스트 화하고, 각 메뉴를 클릭하면 해당 페이지 넘어가도록<a>를 사용했습니다.- 홈 페이지에서는 이 웹 사이트를 설명하는 내용을 적어 어떤 사이트인지 한눈에 파악할 수 있도록 했습니다.
<footer>의style속성은 임의로 설정한 값입니다. 이 글에서는style속성을 무시해도 좋습니다.
index.html
<!DOCTYPE html>
<html lang="en">
  <head>
    <meta charset="UTF-8" />
    <meta http-equiv="X-UA-Compatible" content="IE=edge" />
    <meta name="viewport" content="width=device-width, initial-scale=1.0" />
    <title>HTML 총정리</title>
  </head>
  <body>
    <header>
      <h1>
        <a href="index.html">HTML 총정리</a>
      </h1>
      <nav>
        <ol>
          <li><a href="text.html">텍스트 태그</a></li>
          <li><a href="multi.html">멀티미디어 태그</a></li>
          <li><a href="table.html">표 태그</a></li>
          <li><a href="form.html">폼 태그</a></li>
        </ol>
      </nav>
    </header>
    <main>
      <article>
        <h2>홈</h2>
        <p>
          지금까지 배운 HTML 태그들을 정리하는 사이트입니다. 위 링크를 클릭해
          태그의 종류를 살펴보세요
        </p>
      </article>
    </main>
    <footer style="margin-top: 24px">
      <div>by 개발자고고</div>
    </footer>
  </body>
</html>
3. 텍스트 태그 페이지 구현
index.html을 복사해 text.html에 붙여넣습니다. 홈 페이지의 헤더 부분은 모든 곳에서 필요하므로 모든 페이지는 홈 페이지를 복붙 한 이후 수정해 나갈 것입니다. 즉, <main> 부분만 바뀌고 다른 부분은 모든 페이지가 동일합니다.
article안에 각 태그들을 하나의section으로 구분했습니다.section안에는 태그 이름과 그 태그를 이용한 예시를 넣었습니다.
text.html
    <main>
      <article>
        <h2>텍스트 태그</h2>
        <section class="head_title">
          <h3>제목 <span>h*</span></h3>
          <h1 style="font-size: 32px">h1</h1>
          <h2>h2</h2>
          <h3>h3</h3>
          <h4>h4</h4>
          <h5>h5</h5>
          <h6>h6</h6>
        </section>

        <section class="paragraph">
          <h3>문단 <span>p</span></h3>
          <p>
            Lorem ipsum dolor sit amet, consectetur adipisicing elit. Quia
            commodi rerum neque voluptates voluptatem quibusdam voluptas, id
            repellat soluta non. Quibusdam blanditiis necessitatibus est
            incidunt unde enim voluptate excepturi dolores?
          </p>
        </section>

        <section class="bold">
          <h3>강조 <span>b</span></h3>
          <p>
            <b>Lorem ipsum</b> dolor sit amet, consectetur adipisicing elit.
            Quia commodi rerum neque voluptates voluptatem quibusdam voluptas,
            id repellat soluta non. Quibusdam blanditiis necessitatibus est
            incidunt unde enim voluptate excepturi dolores?
          </p>
        </section>

        <section class="break">
          <h3>줄 바꿈 <span>br</span></h3>
          <p>
            Lorem ipsum dolor sit amet, consectetur adipisicing elit.<br />
            Quia commodi rerum neque voluptates voluptatem quibusdam voluptas,
            id repellat soluta non. Quibusdam blanditiis necessitatibus est
            incidunt unde enim voluptate excepturi dolores?
          </p>
        </section>

        <section class="list">
          <h3>리스트 <span>li, ol, ul</span></h3>
          <ol>
            <li>순서가 있는 ol 리스트 1</li>
            <li>순서가 있는 ol 리스트 2</li>
            <li>순서가 있는 ol 리스트 3</li>
          </ol>
          <ul>
            <li>순서가 없는 ul 리스트 1</li>
            <li>순서가 없는 ul 리스트 2</li>
            <li>순서가 없는 ul 리스트 3</li>
          </ul>
        </section>

        <section class="anchor">
          <h3>링크 <span>a</span></h3>
          <a href="https://developer.mozilla.org/ko/docs/Web/HTML/Element/a"
            >a 태그를 더 알고싶다면 클릭하세요!</a
          >
        </section>
      </article>
    </main>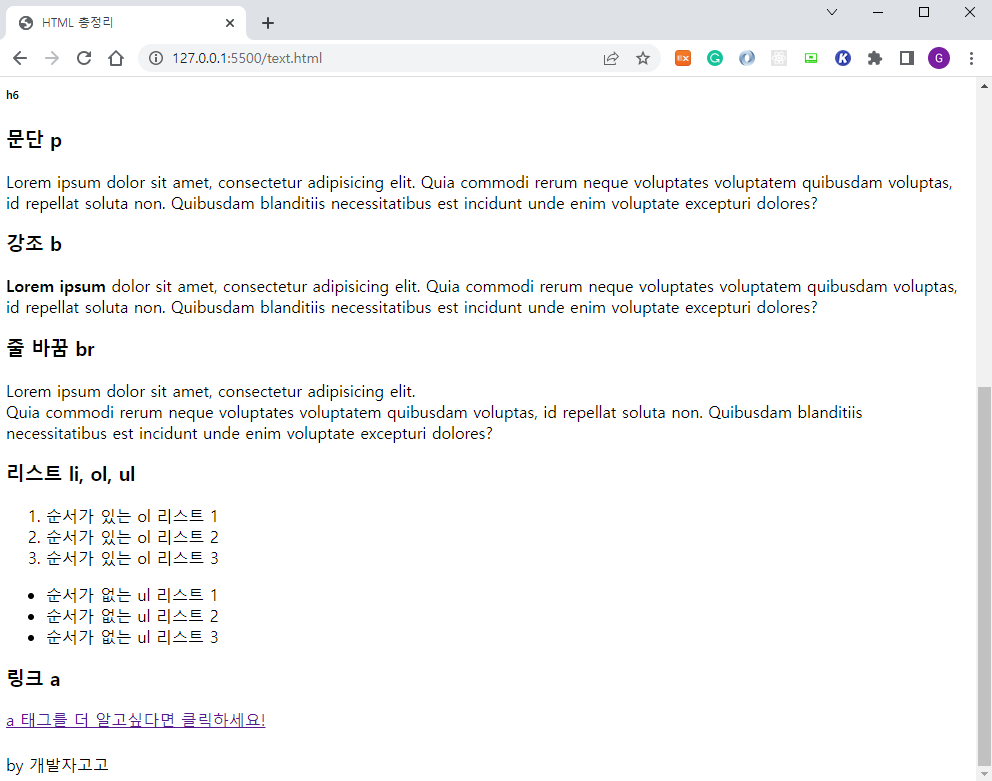
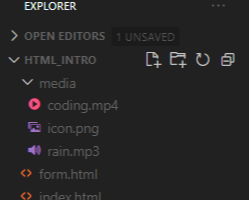
4. 멀티미디어 태그 페이지 구현
멀티미디어 태그를 사용하기 위해 원하는 이미지와 동영상, 오디오를 준비하세요. 그리고 media라는 폴더를 생성 후 그 안에 모두 넣겠습니다.
multi.html
    <main>
      <article>
        <h2>멀티미디어 태그</h2>
        <section class="image">
          <h3>이미지 <span>img</span></h3>
          <img src="./media/icon.png" alt="my_icon" />
        </section>

        <section class="video">
          <h3>비디오 <span>video</span></h3>
          <video src="./media/coding.mp4" width="300" autoplay controls />
        </section>

        <section class="audio">
          <h3>오디오 <span>audio</span></h3>
          <audio controls src="./media/rain.mp3" />
        </section>
      </article>
    </main>
5. 표 태그 페이지 구현
table.html
    <main>
      <article>
        <h2>표 태그</h2>
        <section class="table">
          <h3>테이블 <span>table, thead, tbody, tr, th, td</span></h3>
          <table>
            <thead>
              <tr>
                <th>이름</th>
                <th>나이</th>
              </tr>
            </thead>
            <tbody>
              <tr>
                <td>홍길동</td>
                <td>22</td>
              </tr>
              <tr>
                <td>김민우</td>
                <td>34</td>
              </tr>
              <tr>
                <td>이유리</td>
                <td>28</td>
              </tr>
            </tbody>
          </table>
        </section>
      </article>
    </main>
6. 폼 태그 페이지 구현
이번에는 하나씩 태그들을 나열하는 대신, 회원가입 양식을 만들며 폼 태그를 사용하겠습니다. 여러 가지 input 속성을 활용해 만들어보세요.
form.html
    <main>
      <h2>폼 태그</h2>
      <article class="signup">
        <h3>회원 가입</h3>
        <form action="" method="post">
          <div>
            <label for="user_id">아이디를 입력하세요</label>
            <input type="text" name="id" id="user_id" />
          </div>
          <div>
            <label for="user_pw">비밀번호를 입력하세요</label>
            <input type="password" name="pw" id="user_pw" />
          </div>
          <div>
            <label for="gender">성별을 선택하세요</label>
            <input type="radio" name="gender" id="gender" />
            <input type="radio" name="gender" id="gender" />
          </div>
          <div>
            <label for="bd">생일을 선택하세요</label>
            <input type="date" name="bd" id="bd" />
          </div>
          <div>
            <label for="region">거주 지역을 선택하세요</label>
            <select name="region" id="region">
              <option value="seoul">서울</option>
              <option value="gyeonggi">경기</option>
              <option value="jeju">제주</option>
            </select>
          </div>
          <div>
            <label for="reason">회원가입 이유를 작성하세요</label>
            <textarea id="reason" row="5" cols="30"></textarea>
          </div>
          <button type="submit">회원가입 완료하기</button>
        </form>
      </article>
    </main>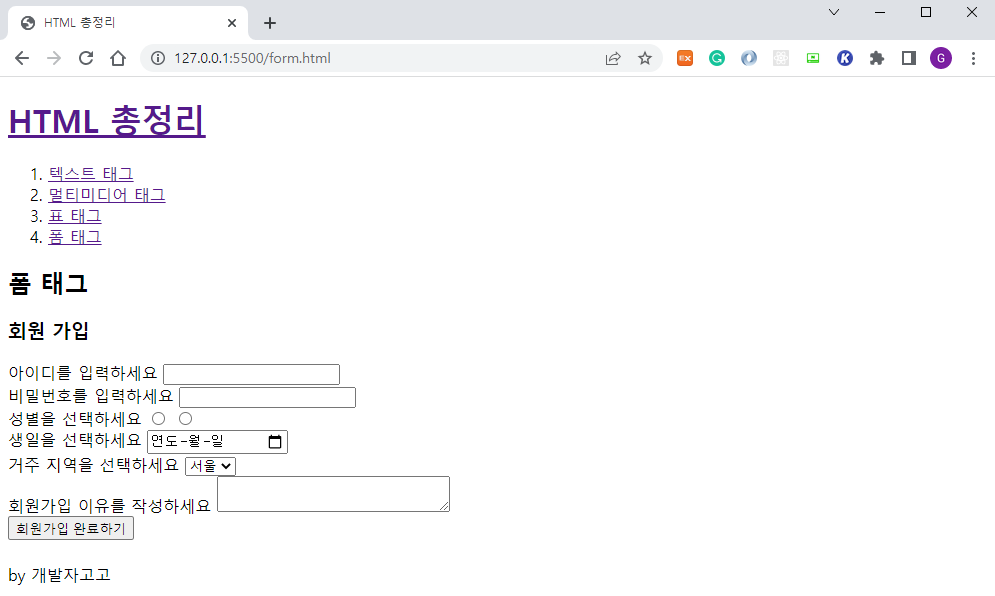
반응형


